
Before you start
You need:- Permission to invite a bot to the Discord server.
- Access to the Roblox Creator Hub account that administers the target group.
- A payment method for hosted Stripe Checkout when live billing is enabled.
- A second trusted staff member if your rank policy requires independent approval.
Activate the workspace
1
Sign in and choose a server
Sign in with the Discord account that will own the workspace. Rodyne lists servers you can manage. Select the intended server carefully: the bot invitation and workspace are bound to that guild.
2
Invite Rodyne
Open the generated Discord invitation and authorize it for the selected server. Rodyne waits for Discord to confirm bot membership before continuing.
3
Review Discord permissions
Run the permission scan. Resolve missing permissions and role hierarchy issues before publishing panels or enabling moderation. See Discord setup for the exact permission set.
4
Connect Roblox
Add the group and an individual-account Open Cloud API key with
group:read and group:write. Complete the harmless capability review before enabling rank writes.5
Choose a plan
Select the plan that matches the number of staff, communities, experiences, history, and evidence storage you need. Checkout opens on Stripe; the workspace activates only after Rodyne verifies the subscription.
6
Finish the setup checklist
Bot Overview opens after activation. Work through Roblox access, role mappings, Studio, staff access, commands, and ticket panels. Each item links to its canonical settings page.
First-day configuration
Complete these in order:- Invite one backup owner or manager and verify their access.
- Configure role mappings from the lowest to highest Roblox rank.
- Test
/verifywith a non-staff member. - Create one ticket-panel draft, run preflight, and send a test before publishing.
- Create a low-risk rank request and confirm its provider read-back.
- Review Bot Management → Activity for the completed jobs and audit events.
Verify success
You are ready for normal use when:- Bot Overview shows the Discord and Roblox connections as healthy.
- The bot role sits above every Discord role Rodyne must manage.
/help,/server,/verify, and permitted staff commands are registered.- A test member can link an identity and receive only the expected mapped roles.
- A test ticket opens in the configured private category with correct overwrites.
- A rank request reaches a terminal, provider-confirmed state.
Demo workspaces visibly simulate provider actions. A demo result is useful for learning the interface, but it is not evidence that live Discord, Roblox, Stripe, or Studio credentials are ready.
If setup stops
Guided walkthrough
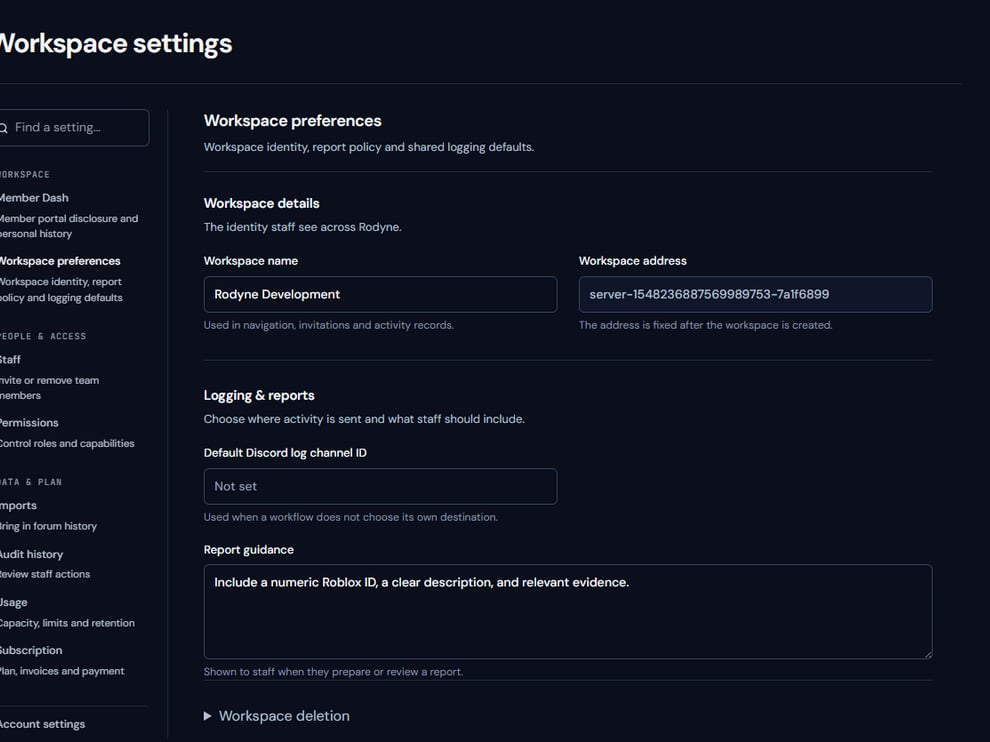
Workspace settings after activation, where owners confirm community identity and configuration.
Operating procedure
1
Confirm the tenant
Match the workspace name and connected Discord server before adding staff or credentials.
2
Finish provider setup
Connect Discord first, then Roblox, and run the capability checks shown in Integrations.
3
Add a recovery operator
Invite one trusted owner or manager and verify that they can sign in independently.
4
Run canaries
Test verification, one private ticket, and one low-risk rank request with controlled accounts.
5
Record launch evidence
Save the successful record IDs and final provider outcomes for the handoff to staff.